If you are using your own flash drive, you will first need to insert the flash drive into the USB port on your RC. Swipe from the top of the screen, downwards. Select the connected flash drive, then format. Once format is complete, you can insert your flash drive into your PC or Mac and download the software from your computer to the flash drive, then follow the steps below. If you received a flash drive from Lucid Bots, the software file has been preloaded and you can proceed with the below instructions.
1. Power up your remote controller (do not power up your drone)
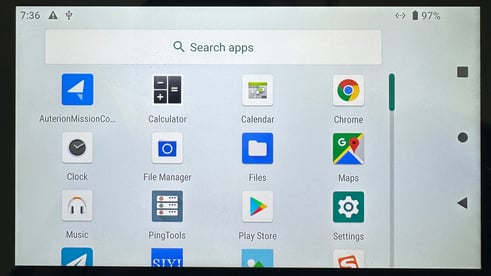
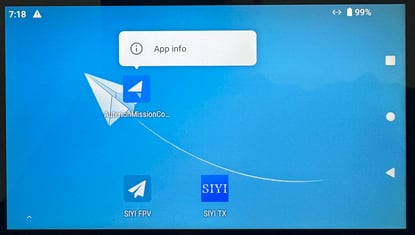
2. Once your RC has powered up, from the blue screen, long press on the Auterion Mission Control Icon (the orange arrow icon). Then press on "App info". Then press on "Uninstall".
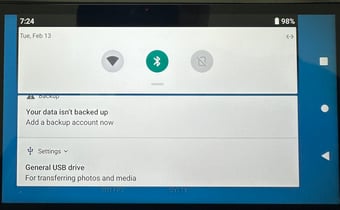
3. Once the app has uninstalled. Insert the USB stick into the top of the RC' USB port. A message may appear, "Choose an app for the USB device". Press anywhere above the message in the blue section to make this message disappear. If the message does not appear, proceed with the next step.
4. From the top of the screen, swipe down. Towards the bottom of the white box, you will see "General USB drive" under "Settings". Press on "General USB drive". Then press on "AuterionMissionControl" with the Android robot icon. A window will pop up, press "Continue". Another window will pop up, press "Install". Once installation is complete, press "Open".

5. Once Auterion Mission Control opens, 2 windows will pop up asking for permissions, press "Allow" on both windows.
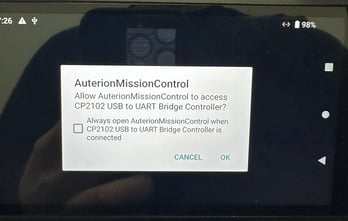
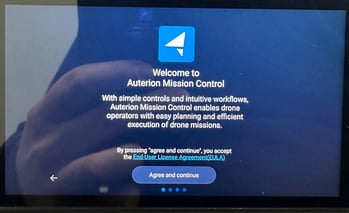
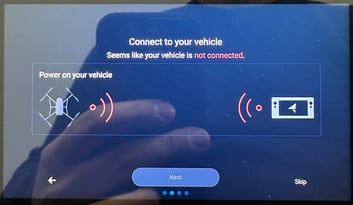
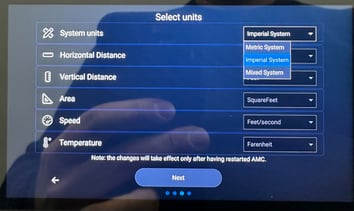
6. Next, a window will pop up "AuterionMissionControl, Allow AuterionMission Control to access...." check the "Always" box, then press "OK/Allow". Then press "Agree and Continue" at the bottom. Then press "Skip" at the lower right for the screen, "Connect to your vehicle". In the next screen, "Select Units", the top right box will display "Metric System", press on the drop down and select "Imperial System", then press "Next" at the bottom of the screen. Then press "Let's Go" in the bottom of the screen.
7. The next screen will say, "There's something new!" Check the box, "Don't show on next start", then press "Got it"

8. In the lower left corner of the screen, press on "Waiting for Video" This will make video the main screen view. Because your drone is not powered up, you will not see video until you power up your drone. Do not power up your drone at this time.
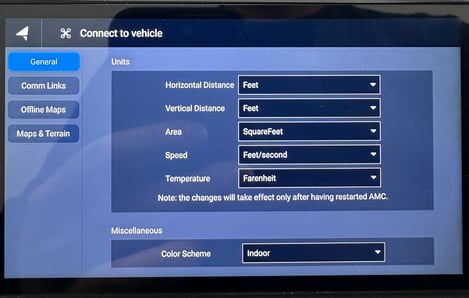
10. Press on the arrow in the top left corner, then press on "Settings" in the lower left corner. Under "Miscellaneous" press on the "Color Scheme" drop down menu and select " Outdoor. This should turn your screen's background to white. Then scroll all the way to the bottom and press on "Close" under "Close AMC" (You must close it in this way to save the settings).
11. Return to the main blue screen by pressing on the square on the right side of the screen, then pressing in the blue area of the screen. Now swipe from the bottom, upwards. You will see the AuterionMissionControl (Blue background & white arrow icon) app in the top left. Drag the icon up to your main blue screen by pressing and holding. Congratulations, your update is complete! You can now power up the drone to ensure it connects to your RC.